Prototypes is a weird and much avoided topic but vital towards mastering JavaScript. While classes are much easier to understand and is often the starting point for many when learning object oriented programming, prototypes is the foundation on which JavaScript is built.
It looks like a class, it smells like a class but it’s not a class — so forget what you know about classes and object oriented programming for a moment if you want to truly understand the concept of prototypes.
No. I lied. Let’s have a quick look at how traditional class based object oriented programming works.
Classes — the master blueprint
Traditionally, object oriented is often taught and represented as a blueprint. The idea is that everything is an object as some sort and all you have to do is create the ‘blueprint’ for that object and instantiate new ones every time you needed a unique instance of it.
Classes are often the go to example. However, a class is merely an object creation pattern. Others do exist and in JavaScript, prototypes are used instead of what’s commonly experienced and used in other languages like Java — a language that only shares similarities in name and nothing much else.
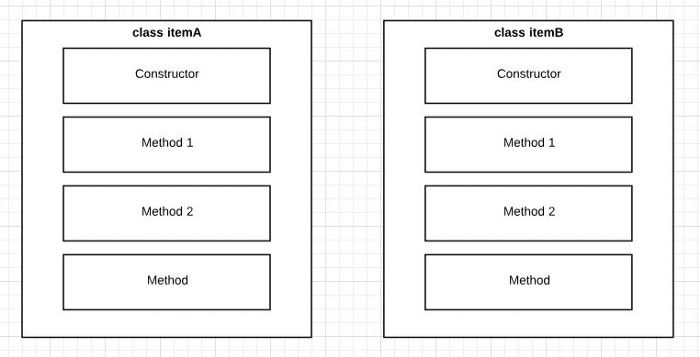
Classes (not language specific) often have a constructor with methods that are called to perform some sort of action. They’re constructed this way because it gives clear boundaries and ring fences around objects — the idea being that all objects are ‘things’ and all ‘things’ have properties and functionality.
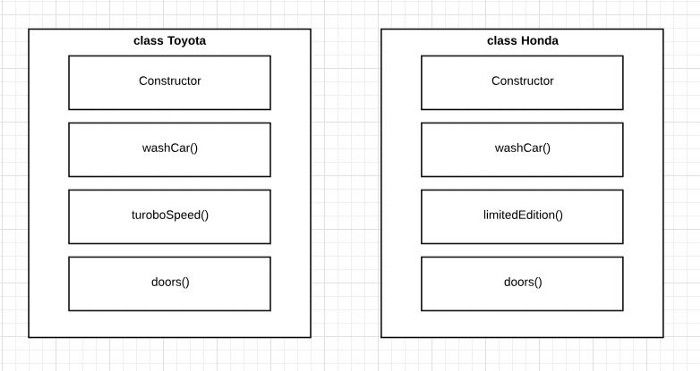
However, reality isn’t always as clear cut and defining objects can often be difficult. You can share methods, create super and sub classes but that’s a different story. Some times, when you create a class, it can have duplicate features with another similar but not quite the same class.
Prototypes — do you have a pen?

Don’t get me wrong, but classes can be great. However, JavaScript is built on the idea of prototypes.
A prototype is like a deconstructed class that are joined together through references. If a class is like a blueprint, then a prototype is like asking yourself — do I have a pen? if the answer is no, you ask your friend. If they answer no, your friend goes and ask their friend. The process continues until the final person doesn’t have a friend.
When you create a function in JavaScript, it automatically creates an empty container called prototype for you to stick your methods into.
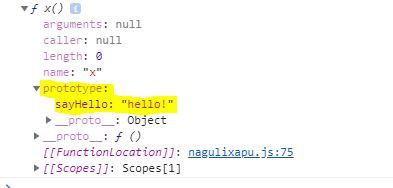
So, if I were to write function x() {} and console log out x I should see something like this:
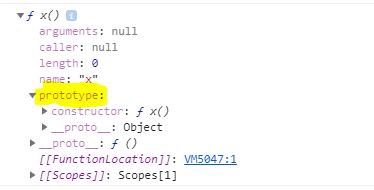
This means, we can add things to prototype by using something like this:
x.prototype = { sayHello: "hello!" }Which will show up under prototype and let us call it when we instantiate a new object from the function.
Confused yet? Here’s a diagram.
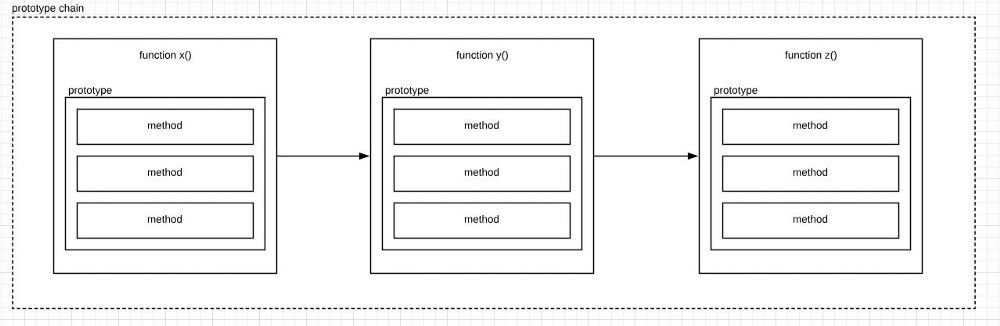
When you connect up the functions, the methods set inside the prototype becomes available from left to right. Anything in x and y is available to z but not the other way around. Hopefully, that pen analogy earlier makes a little bit more sense now.
New Initialization Pattern
There are 4 ways to initialize to create a prototype chain — but for this piece, I’m going to do an example of the new initialization pattern. I find this the easiest way to demonstrate prototypal inheritance and chaining, especially for those who are still trying to absorb and understand the idea.
Lets start with an empty Car function. You can have stuff inside it but for the purposes of this demo, we’re going to leave it empty.
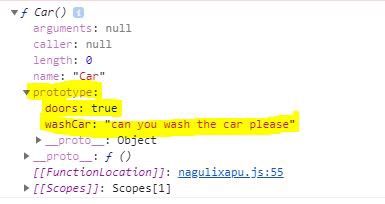
function Car(){}Then we’re going to add a property to the Car’s prototype
Car.prototype = {
  washCar: "can you wash the car please",
  doors: true
}
Now, when we console.dir(Car) this, we should see washCar and door under prototype.
Let’s create another function so we can chain them up and get some inheritance going.
function Honda(){}
We’ve got our Honda() function. Now we’re going to create a reference and linkage to Car by instantiating the Car function with new.
let HondaProto = new Car;
You can also set your own prototype methods on HondaProto as well like so:
HondaProto.limitedEdition = function(){
return "this is a Honda car";
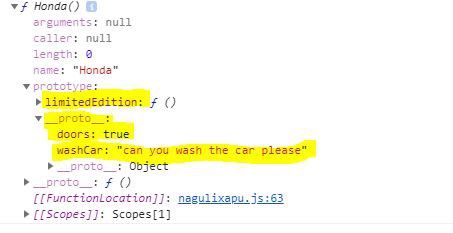
};To link up your Honda function with your prototype blueprint, just set HondaProto to Honda.prototype.
Honda.prototype = HondaProto;Now, if you were to console.dir(Honda), you will see that the function Honda() now has limitedEdition as immediately accessible under prototype with doors and washCar available as a reference to __proto__
Lets add one more function to the inheritance chain so you see the chain in console log form.
function ElectricHonda(){};

let specialFeatureProto = new Honda;

specialFeatureProto.electricDrive = function(){
   return "I am an electric car";
};

ElectricHonda.prototype = specialFeatureProto;
Same pattern creation as above. This will now add another __proto__ nested inside console log output.
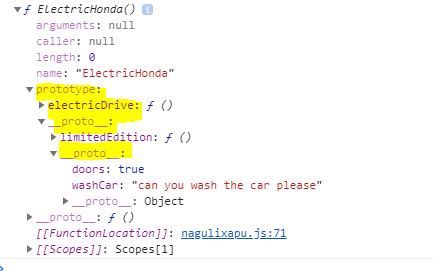
Now if you initialize a new object with ElectricHonda() and call the washCar method, the object will have access to all the Car object’s methods and internal settings. Any changes that happens furthers down the chain is also inherited by the children.
let LX4576Honda = new ElectricHonda();
console.log(LX4576Honda.washCar);
The above will return the following result:

Although LX4576Honda doesn’t have any kind of washCar method available, it keeps going down the chain until it finds a match. If nothing matches, then it will throw undefined.
You can also have one prototype function attached to another chain and therefore share the function. The method of creating such a relationship is exactly the same illustrated above. Logically, if we continue to use the example so far, it should look something like this.

Final words
The efficiency of prototypes and prototypal inheritance is that you’re not creating a whole new bucket to house all the methods inside. Rather, you’re just creating references to the functions and only call them as needed. With classes, those methods are sitting in the bucket and waiting to be called.
Hopefully the above example makes a bit of sense to you and helps you understand prototypes a little bit better. There are other ways to initialize and create a prototype inheritance chain but for length and to prevent them from confusing you, I’ve omitted them from here and just showed you how to create an inheritance chain using new initialization pattern. However, you should go and check out Object.create, Object.setPrototypeOf and __proto__.
These three listed alternatives are equally valuable and great alternatives for creating a prototypal inheritance chain.